In this excerpt from her classic book Centered Riding 2, visionary instructor Sally Swift provides easy exercises to improve your body position over fences.
The angles of the hips, knees, and ankles close and open to follow the changing thrust and movement of the horse’s body as he jumps. You can’t guess which angle will be needed and try to assume that position beforehand. Instead, you must stay in balance and just allow the thrust and motion of the horse to open and close your angles as needed. This is a key component in jumping without getting ahead of, or behind the motion, and being safe and secure over fences.
Your hip joint plays a major role in the angle. Ideally, your legs and feet remain under your body and quiet on the horse’s side, and the flexing and opening of the hip, knee, and ankle joints allow your body to go with the jump. However, excessive tension can lock up your hip joints and interfere with the free, smooth, and balanced opening and closing of this essential angle. When this happens, the hip joint doesn’t completely freeze up, but it becomes less mobile than it should be and closes superficially, instead of deep in the joint. Stiffness in the hip joints will cause the legs to pivot forward or backward out of position. Some riders bend at the waist instead of flexing enough in the hip joints, causing a round, or “roached,” back. Hips that are tight may fail to fold enough so the rider falls behind the motion, or they may fold too little and then tip the rider forward, making her precarious and ahead of the motion.
Locate the front of the hip joints with your fingers, but realize that the ball of the femur and the actual hip joint are deep inside. The ball of the femur is about 2 inches in diameter—about the size of the ball on a trailer hitch. As you sink into a half-seat jumping position (with your hands as if you were holding reins), breathe out and feel your hip joints closing deep and far back inside the socket. Notice also that as the hip joint folds deep in the socket, your pelvis tips and your seat bones slide backward, pointing back and down. This is quite a different feeling from the one you get when doing this exercise in an upright, deep-seat position.
Stand up and try it again, but this time hold your breath, and tighten your seat and hips. Notice that if you fold only at the front of the hip joint, you tend to lose your balance more easily. Your seat bones do not slide as far back, and they may point back and even up, like a bird with a turned-up tail.
Practice again, by breathing out and allowing your hips to close smoothly and farther back up in the joint; you will find that you can sink deeper and more quickly, as if jumping a big fence, but with less strain. Allowing your knees and toes to line up naturally will also help; you can’t have free hips with tight knees!
Your head, neck, and spine are the essentials in the balance of your upper body when jumping and riding the approach to a fence. They should work together as a coordinated unit, keeping your balance together in a manageable “package” instead of breaking up into many uncoordinated separate parts. This unit needs some muscle tone to keep it from becoming loose, floppy, and uncontrollable, but it also needs spring, resilience, and grace. Smooth, balanced control of the upper body is crucial for independent hands and control of your horse. The ideal back appears flat (although it still has the natural curves of the spine), not tensely arched, or round and slumped.
The best way to achieve a good functional back and upper body for jumping work is to keep letting your spine lengthen. Even though the back is angled forward more than in the upright, deep seat, it is equally important to lengthen the spine. A hollow back is a shortened back, and a round (or roached) back shortens the front of the spine. Both positions stress the back and make it harder to keep your balance and use your joints as springs.
When learning to jump, it is common to hear instructors say, “Hollow the loins,” or “Arch your back.” These commands go back to the very beginning of the forward seat as taught by Federico Caprilli, and they are still a common way of getting a slouching rider to straighten up. However, hollowing the loins, or arching the back is often overdone, causing a stiff, tipped-forward pose that causes stress, stiffness, and lower back pain. Lengthening the spine is a better way to achieve a flat, functional back, along with a more athletic way of using the body.
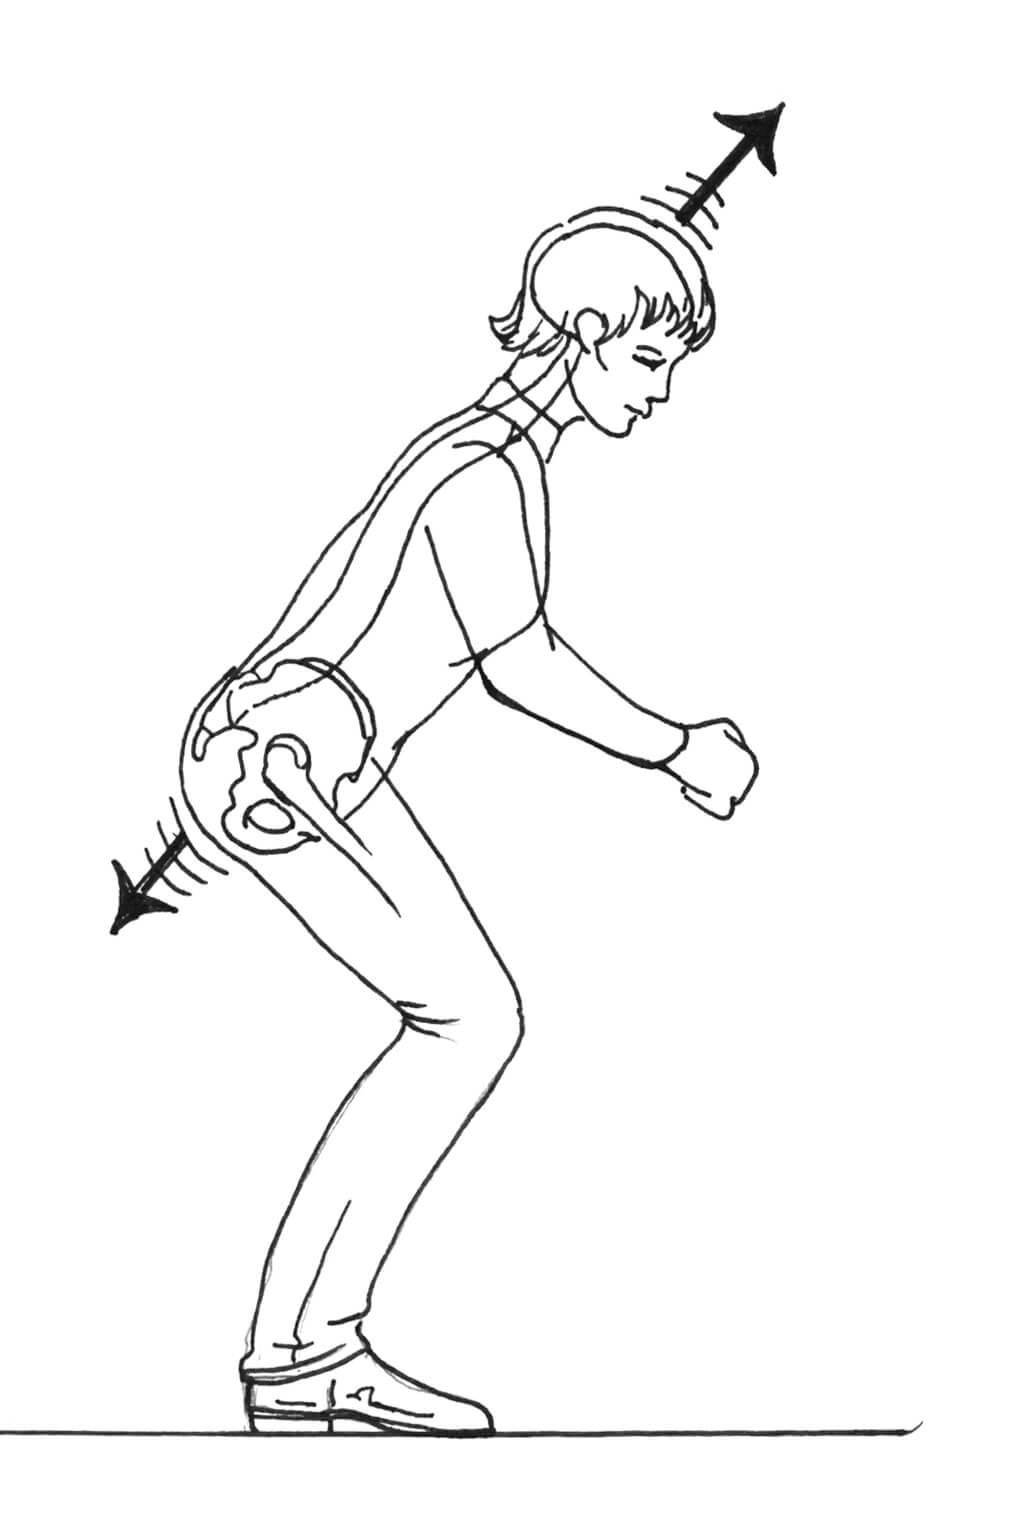
Try folding into a jumping position over your feet, allowing your spine to lengthen briefly. For this exercise, allow the top of your head to follow the same angle as your spine. As you take a breath, notice the lengthening of your head, neck, and rib cage along the angle of your upper body. During your next breath, notice the slight stretch in your lower back, loins, and abdomen, and the space between your last ribs and the top of your hipbones. Notice how your sacrum and seat bones seem to stretch backward and downward for a split second, lengthening the lower part of your back and seat.
Another way to achieve this lengthening is to imagine a rubber band running through your spine being briefly stretched in both directions, out the top of your head, and out of your seat bones. Notice that when your spine briefly lengthens, your hip joints, knees, and shoulders, also become free and elastic.
This excerpt from Centered Riding 2 by Sally Swift is adapted and reprinted with permission from Trafalgar Square Books (www.horseandriderbooks.com).